
How to Take Care of a DSLR

1)Always store your camera in a hard case.

Soft camera bags are light and convenient--great for day trips and hikes. But at the end of the day (and especially when traveling) your camera should always go in a hard case. Accidents happen all the time, and when push comes to shove a little neoprene (or worse, a layer of poly fill) won't keep your expensive equipment safe.

A hard case can stand up to a lot more abuse. For example, I was in a terrible car accident a few years ago, and my camera (in a hard case) was in the front seat with me, sitting on the floor. When the engine block was pushed back it shattered my femur... but my camera case, and the gear inside, was fine. Three years later, the case is still in use. It did not require professional repair. The accepted standard for safety in hard cases is Pelican. Pelican cases are air- and water-tight, they float, and the cases and their contents are guaranteed for life against everything except meteor showers and small children.

2)Always cap your lens when you're not actually taking a picture.

Any time your camera is set down or there's a lull in action, put a lens cap on your lens. Lenses become dirty and scratched easily, and can be very expensive to replace. A scratched lens can result in scratches or spots appearing on photographs. Additionally a lens cap can absorb damage if something hits the lens or if the camera is dropped, but without the cap the lens itself is more likely to shatter.


3)Keep a lens cloth, brush, and cleaning solution with you whenever you have your camera.

Keeping lenses clean helps prevent scratches from particles and keeps images crisp. Always use cleaning supplies intended for cameras, and make sure to follow the directions on packages.

4)Keep a clear or UV filter on lenses at all times.

Filters cover the lens completely, so anything that would scratch the lens would instead scratch the filter. If the filter becomes too scratched to use, just replace it. Clear filters are generally very inexpensive, especially compared to the cost of replacing the lens itself.


5)Keep camera equipment out of intense heat and damp weather.


Heat can cause lenses to break and can of course damage any electronics. Never leave your camera in a hot car for long periods, and if you feel your camera or lenses becoming hot after a day of shooting in the sun, try to get into a cooler area and let them resume normal temperature.

If you live in a very humid area, make sure you store your equipment in airtight cases. When shooting in fog, rain, or near bodies of water where splashing might occur, use an all-weather bag or underwater housing. At the very least, put a gallon-sized ziplock bag around your camera with a hole for the lens.

6) Send your camera body in for professional cleaning occasionally.

If you shoot often, I'd recommend at least once a year, more if you shoot outdoors often or under harsh conditions.


Nikon D3100 /Nikon workshop


Nikon has unveiled the D3100, its latest entry-level offering and its first DSLR that can record full 1080p HD videos. Successor to the popular D3000, it is built around a 14.2 CMOS sensor and a 3 inch LCD. As well as movies it gains Live View shooting, a wider ISO range ( 100-3200 expandable to 12800) and a host of small revisions. The camera will be available soon at a retail price of £579.99 / €599 with the 18-55mm VR lens. We've been given access to a pre-production version of the camera which we've used to prepare a hands-on preview, looking at the changes Nikon has made to its best-selling DSLR.

Kalu nak tau lebih lanjut sila klik di sini :::Nikon


Selain itu ada Work shop pada

Tentative D3100 Workshop Schedule
Date Day Location Availability

17-Dec-10

Fri Kota Bahru Yes
18-Dec-10 Sat Kuala Lumpur Yes
19-Dec-10 Sun Kuala Lumpur Yes
8-Jan-11 Sat Kuantan Yes
9-Jan-11 Sun Johor Bahru Yes
15-Jan-11 Sat Kota Kinabalu Yes
15-Jan-11 Sat Penang Yes

Terms & Conditions:

1. This registration is open to NIKON D3100 camera users with Nikon (Malaysia) Sdn. Bhd. warranty only. Participants are required to bring their warranty card & receipt during entry to workshop for verification. Nikon (Malaysia) Sdn. Bhd. has the rights to reject any participants who failed to show a valid warranty card & receipt.

2. Registration is on a first-come-first-serve basis and limited to 50 seats per session.

3. Registration period is from 1st Nov 2010 to 30th Nov 2010.

4. Nikon reserves the right to cancel or postpone or change the scheduled workshop at anytime and any payment made will not be refunded.


For More Information Please Kindly Refer to:: Nikon Promotion

How to Photograph Silhouettes in 8 Easy Steps

1. Choose a Strong Subject

Almost any object can be made into a silhouette, however some are better than others. Choose something with a strong and recognizable shape that will be interesting enough in its two dimensional form to hold the interest of those viewing your image. Silhouettes can’t draw on the colors, textures and tones of subjects to make them appealing – so the shape needs to be distinct.


2. Turn off your Flash

If you have your camera in automatic mode your camera will probably want to use its flash which will ruin the silhouette. Basically you want as little light on the front of your subject as possible – so the flash has to go (basic – but I’ve seen a few attempted silhouette shots with the flash firing).


3. Get Your Light Right


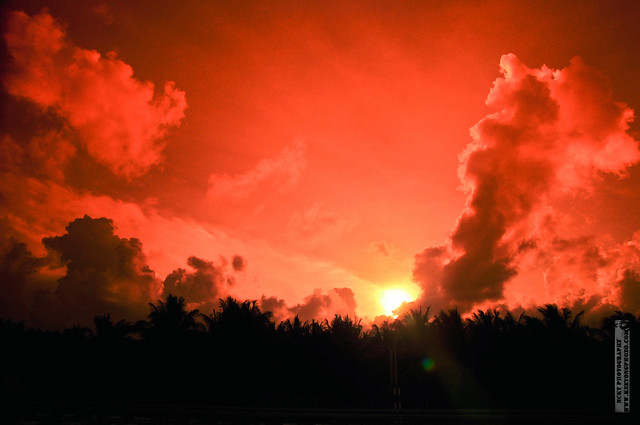
When it comes to lighting your subject you’ll need to throw out a lot of what you’ve learnt about normal photography and think a little backwards. Instead of lighting the front of your subject, in silhouettes you need to ensure that there is more light shining from the background than the foreground of your shot – or to put it another way – you want to light the back of your subject rather than the front. The perfect light for this is placing your subject in front of a sunset or sunrise – but really any bright light will be able to do the trick.

4. Frame your image

Frame your shot so you are shooting with your subject in front of a nice plain, but bright background. Usually the best backgrounds will be a bright cloudless sky with the sun setting. You want to position the brightest light source behind your subject (either so that they hide it or so that its in the background somewhere).

5. Make silhouetted shapes distinct and uncluttered

If there is more than one shape or object in the image that you’re attempting to silhouette, try to keep them separated. ie if you are silhouetting a tree and a person don’t have the person stand in front of the tree or even leaning on it as it will merge them into one shape and as a result your viewers could be confused about what the shape is.

Also when framing you’ll probably want to photograph silhouetted people as profiles rather than looking straight on. This means that more of their features (nose, mouth, eyes) are outlined and they are more likely to be recognized.


6. In Auto Mode

Most modern digital cameras have automatic metering which are pretty good at sensing how to expose a photograph so that everything is well lit. The problem with this is that most cameras are so smart that they will light up your subject instead of underexposing it to get a silhouette so you need to trick it. Most cameras work out the exposure levels in auto mode when you push your shutter half way down (at the same time that they focus). So point your camera at the brightest part of your picture and then press the shutter halfway down (don’t let go). Then move your camera back to frame your shot with the subject where you want it and then finish taking the shot. With most digital cameras this will result in a silhouetted subject. In effect what you’re doing is tricking your camera into thinking that the bright part of the image is the mid tone of it so that anything darker than it will be exposed as a nice dark shadow.

Some digital cameras also have ’spot’ or ‘centered’ metering modes that you can switch on which helps with the above technique as they will set the metering on the central spot of your frame rather than multiple spots. This means you can accurately tell your camera exactly which bit of the bright background you want it to set the exposure on.


7. Manual Mode

If this technique doesn’t work and your camera has controls to allow manual exposure or exposure compensation you might like to try some of your own settings. The beauty of digital is that you can experiment to your hearts content until you get the result you’re after.

A simple way to start using manual mode is to look at the shutter speed and aperture that it suggests in automatic mode and to start from there. If in auto mode your subject is too light (ie you need to make it darker) stop down the shutter speed a stop or two and see what impact that has. Use the ‘bracketing’ technique that I described in my previous tip on sunrises and sunsets to get a variety of shots at slightly different exposures.


8. Focusing

In most cases you’ll want the subject which is silhouetted to be the thing that is in focus most crisply. This can mean that the process described in point 4 can be a little tricky as pushing your shutter half way down to get the metering right also means that you’ll focus on that spot in the background. To get around this you can use two strategies. Firstly if your camera has manual focusing you might want to try that. Pre focus your shot before you meter your shot.

The other strategy is to use Aperture to maximize your depth of field (the amount of your image that is in focus). Set a small aperture (ie a larger number) to increase the depth of field – this means you’re more likely to have a sharper foreground and background in your shots.

One last tip on Silhouettes – while a total silhouette with a nice crisp and black subject can be a powerful shot, also consider the partial silhouette where some detail of your subject is left. Sometimes a touch of light on them makes them slightly more three dimensional and ‘real’. This is the beauty of bracketing your shots as it will leave you with total and partial silhouettes to choose form.


Read more: http://www.digital-photography-school.com/how-to-photograph-silhouettes#ixzz15hNrZjyF


Three Word


Your smile make the day so bright and call me how willing to.
I'm willing to do the clown fight the roots of a smile..

Never thought one thing that there are such a thing
Worthy of nostalgia today, that can die for you


There was once talk about every day,
you know that although the words did not innovative but it is interesting.

I buried storage reservoir buried so many verses,
I just want you to laugh with me
.

Three words that everyone used to convince
So weird, but how many people really understand
That means I only know that I just want you to be happy
..

While a lot of talk about the truth to live in.
Since then, you know I was not afraid of anything
Never thought one thing
One thing that there are so worthy of our nostalgia
Today, you really can die...

Even today no longer tell me how to break through yesterday, all unnecessary
Even today I am no longer willing to wait yesterday past..
Once there was three words every day,
though they do not know about you, but interesting new ideas
I buried storage reservoir buried so many verses I just want you to laugh with me
.

So weird, but how many people really understand
That means I only know that I just want you to be happy
I just want you to be happy
..

Perancangan tidak semestinya lancar...

Perancangan kita tidak semestinya berlancar.Kita selalu kata,kita hanya merancang,tuhan yang menentukan.Aku rasa itu benar sekali dengan kata-kata tersebut.Ye hari ni perancangan aku ingin pergi rumah kawan. tetapi atas sebb tertentu aku terpaksa batal perancangan aku itu.biarlah...salah aku jugak...aku agak kecewa satu hari ni...entah kenapa...mungkin salah aku,atau salah dia..tetapi aku xnak salahkan siapa-siapa...

k la..xada mood nak tulis pe2...biar je la.....memang sukar nak lupa benda mcm ni....

Pelangi Petang

Dari semester satu aku kenal dia di kuliah "Management"walaupun kita hanya jumpa tetapi tidak pernah bercakap..Aku agak kagum dia semasa dia membuat perbentangan.Dari cakap-cakap gila..hahaha...Dia bukan sahaja pandai bercakap tetapi pasal ambil gambar,memang terbaik

Semasa aku semester kedua aku beli DSLR dan berguru dan meminta pandangan dengan dia cara-cara untuk mengambil gambar.Dari sana aku mengenali DSLR,Aperture,Shutter Speed dan lain-lain.Dia selalu bercakap"Merangkak dulu,Jalan,baru lari"Ayat yang selalu keluar itu sering menjadi peringatan aku..kata-kata tersebut juga bawa dalam kehidupan aku juga...

Kini aku sudah boleh berdiri,tetapi aku tidak berani untuk mengambil gambar sorang-sorang.Dia bagi nasihat lagi "berdikari"itu kunci seterusnya.Dengan itu lahirlah keberanian aku untuk mengambil gambar.Tidak kira di mana aku,kamera tetap di hatiku di samping ku(aweks xbuat lak mcm ni)hahahha..

Da da..aku xnak puji dia lagi...hahaha....sejauhmana dia berada dia tetap SIFU aku,walaupun mulutnya laser,sharp shooter..aku juga menghormat dia sebagai orang memberi ilmu...sekian...layan gambar kat bawah lak...


Ni la Sifu aku...hahahahah...macho x?ahaha
.
.
.
.
.
.
Raja,Dato,Sifu...take care...huhuhu
.
.
.
.
.

Apa moti diorang buat mcm ni?hahahaha
.
.
.
.
.
Indahnya Alam,Sang Pencipta

Twitter Delicious Facebook Digg Stumbleupon Favorites More

 
Top Web Hosting | manhattan lasik | websites for accountants